Sunday, January 10, 2010

How to Setup Edit G/L Writeoff and Credit Defaults with in CSI Applications

To Add a GL Type


1. Click System Setup Edit G/L Writeoff/Credit Defaults
2. Click Add New Button
3. Select the type from the drop down
4. Enter a description that will be displayed when this occurs.
5. Enter the proper GL account numbers.
6. Click next or previous to save the changes.


Note – To have a more precise gl breakdown enter the appropriate gl numbers
In the Gl debit and Gl credit fields.

Wednesday, January 6, 2010

Norton's Virus Update (Caution)

During a recent Norton's virus update, there is an issue with it viewing our report viewer as a virus and removes it.

Steps to take if it prompts you.
1. When you click on a report button, it goes through a series of steps and then launches a seperate screen to view the report. If it has been blocked then it will not show the report but will pop up a box down by your clock that it states " The virus threat has been removed."

2. Click on the box.

3. Follow the instructions to putting it back in and making it a safe program to launch.

4. Once that is complete, then you should not have an issue.

Monday, January 4, 2010

New Features in 2010 Update (Part Two)

There are so many advancements in this year's updates that we broke it into two Blog articles.  Be sure and read Part One to learn about all of them.

These features were improved in all applications.
1. Special Penalty and Interest Formulas - Over the past year we have incorporated at least 5 new penalty and interest formulas and really feel that the system can handle the crazies calculation methods performed by our current and future users without custimization.  If you have a specialty method contact support to learn more.
2. More accounting export options - We have increased the number of standard accounting software exports in the session control balancing.
3. Transaction delete audit trail - We have increased the data available if a transaction is deleted by a user.
4. Payment entry edit - With security you can edit information like the check number in the payment history.
5. Expanded GL balancing - We are tracking even more data in our gl history for expanded reports.
6. GL transactions expanded- As you know the gltran is where we make an entry every time a charge is applied, modified and paid.  This transactions are stamped with the date which makes it possible for you to run "Period in Time" reports such as year end.  A user should first turn on the AR transactions so that reports show an initial charge and then everything that happened to that charge through the process.
7. New GL based balance, trial balance and aging reports - These reports are great audit and Fiscal year tools revealling everything that occured during a time period.  In order to use these reports, users must perform consistent taks such as adjusting off a charge and not simply deleting the charge.  That way the system will produce dynamic reports for you.
8. Internet Search and Pay websites - You can offer your citizens online access to read only data with no effort.  The system can automatically query the balanced data and upload it to Capital's FTP server at night.  It has been proven that offering citizen access to data can eliminate as much as 4 weeks worth of phone calls.
9. Batch Line Items - Using the batch payment processor, a user can prioritize what line items to pay off and in what order.
10. Central Cash Receipts Posting - Using Capital's "Remote Payment" software you can accept a payment for anything at the counter and post it live or as a batch to the correct application.  Call support for your interest in the Central Cash Receipt Posting.
11. Security expanded to field level control - You can define a user's access per field.

There are a lot of reasons to be excited about your Capital application.  We will continue to refine features based upon your suggestions.

New Features in 2010 Updates (Part One)

The Updates currently being implemented with our customers pack quite a punch.  Many of the users going through the update process have asked what to expect.  Here are a bunch of the features in the new releases.

These advancements have been made to all programs.
1. Session Tracking - When you log in, your transactions will be tagged with a session number.  This makes balancing across days a breeze.
2. Advanced Terminal Balancing Reports - Summary and Detail versions with advanced logic for credits, writeoffs, reversals and more.
3. Improved Accounting Interface - Easy balance and export AR and Payments.  The improvement is in your control to mark items as balanced prior to release by session.  You can even insert the Effective date of the transaction in the export file if you prefer.
4. Overall form layout.  Almost all items are in the same place for your comfort and new fields and cosmetic touches have made your ease of use improve.
5. Adjustments - The preadjustment process has been improved to offer the user even more control, notes per adjustment and expanded calculation methods.
6. Payment Reversals - This process has been refinded to expand notes, reprintable copies and more. It can even apply or remove a credit from an account if reversed.
7. Tran Codes with greater AR control.  Each segment (base amount, penalty, interest, etc.) can be assigned individual gl account numbers for absolute user control.
8. Timer - Expanded to 3 hours for your convenience and it resets with movement of the mouse in the program.
8. Inline Monthly Penalty and Interest - This is a major feature that many users will want to use.  Currently if you want monthly penalty or interest you have to spawn a transaction.  Now with a couple of clicks you can set up a tran code to generate a monthly penalty and / or interest charge and have it displayed in the penalty and interest columns of that charge.  This means that effect dating will work and makes it easy to add or remove the amounts.


There are many more advancements that we will include in the next article.

Interface your Accounting Software

Interface your Accounting Software
(Including the New Session Control)

Did you know that your Capital Software products can pass transactions into your Accounting Software. In some organizations, this interface can save a lot of time by eliminating journal entries.

The two most common Accounting Interfaces are for Sage MIP Fund Accounting and Quickbooks. Many other interfaces have also been performed for products like Microsoft Dynamics and regional accounting products.

Things needed for a good interface:
1. General Ledger numbers setup on all tran codes.
2. General Ledger numbers setup for credits, refunds and writeoffs.
3. Daily balancing of your transactions.
In your 2010 release everyone will have access to the new Session Balancing program from Capital. All transactions are now grouped in sessions so it is easy to balance payments (even across multiple days).
After running the balancing report, you simly push a button to mark that session as Balanced.  This and other sessions are then ready to be exported to your accounting software.

Here are some items to consider when getting started.
1. Do you have your gl numbers on your trancodes.
2. Do you know the steps to import a batch into your accounting software.  It is standardized on most accounting products.
3. Be careful for QuickBooks, it does not easily handle some transactions like a credit.

Contact support if you have an interest in interfacing your accounting software with your Capital products.

Sunday, January 3, 2010

How to setup a shortcut to CSI Applications.

Setting Up Shortcut

For this Demonstration the Util32 folder will be used but these steps may be used to create a shortcut for anything you wish.

1: Right CLICK anywhere on your desktop.

2: CLICK on New/ Shortcut.

3: CLICK the BROWSE button. Go to the Location of the UTIL32 (c drive or network) and find the property_tax.exe or application.

4: CLICK NEXT, and enter a name such as Capital THE Utility BILL that you want to call the program.

5: CLICK FINISHED.

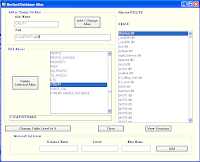
Changing the BDE link within the Utility, Property and Revenue Management Softwares.

How do I Change the BDE if it is pointed incorrectly?

During installation, when you first log into the software a license agreement screen will appear. When you select util32 from the drop down menu, the system will then ask you to create a BDE entry (so the system knows where the data can be found). Select the proper location of the util32 folder whether it is on your local computer or the server.

If you notice the program is pointed to your local machine instead of the server you can change the BDE by following these steps:

1. Right click START button and choose EXPLORE. When Windows Explorer opens find the capsoft /util32 folder on the left side of your screen.

2. Clicking on the util32 folder will display all of the files inside that folder on the right. Find a file called BDEADD.EXE and double click.


3. A screen will open. It will try and scan your computer for all of the known database connections on your computer. When it is complete, type util32 in the name field at the top of the screen. Then click in the path location field below it.

4. A browse box will launch and allow you to find the location of your data on the server. Find the util32 folder on the server and click on it.

5. Then click OK. The browse screen will disappear.
If the path is correct, click ADD and you are finished redirecting the path of your BDE.
Note: These instructions may also be used with the Property and Revenue Management softwares. Instead of searching for Util32 the search would be done for Prop32 or Lic32.